Richman Photo Art
  • Home
  • News
  • Portfolios
    • New Jersey Landscapes
    • Arthur Kill
  • Galleries
    • Bridges
    • Courthouses
    • International Travel
    • Natural World
    • Sunrise/Sunset
    • Traveling the USA
    • New Jersey
  • Through the Lens
  • The Photographer
  • Contact

Making the Compromise

12/9/2022

2 Comments

 
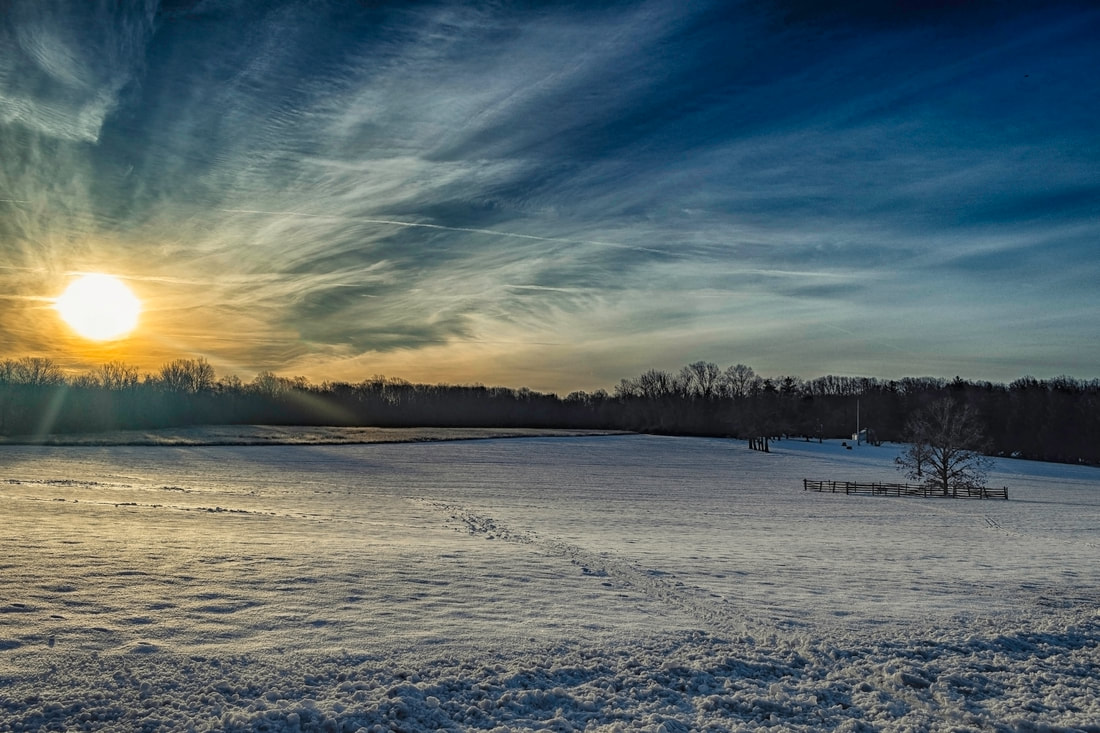
Photography is often about compromise. You can sometimes shoot the image exactly as you want it, making adjustments for exposure and sharpness. In many cases, however, that will not work. That is especially true when components such as leaves, animals, or water move.

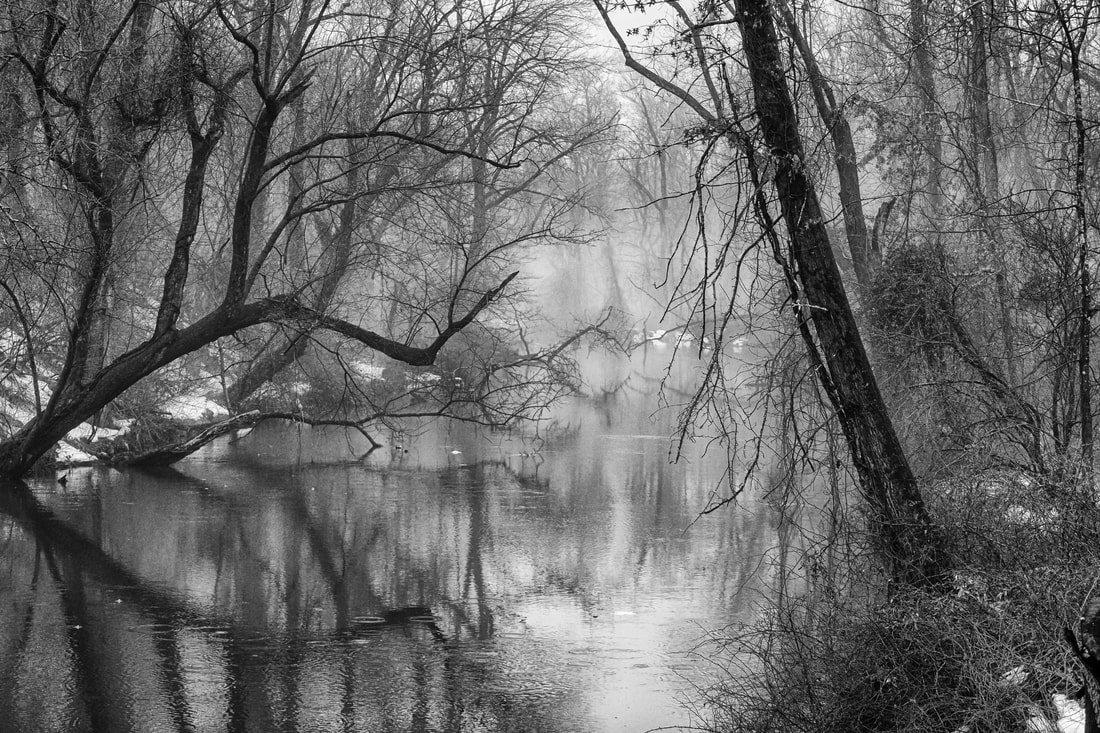
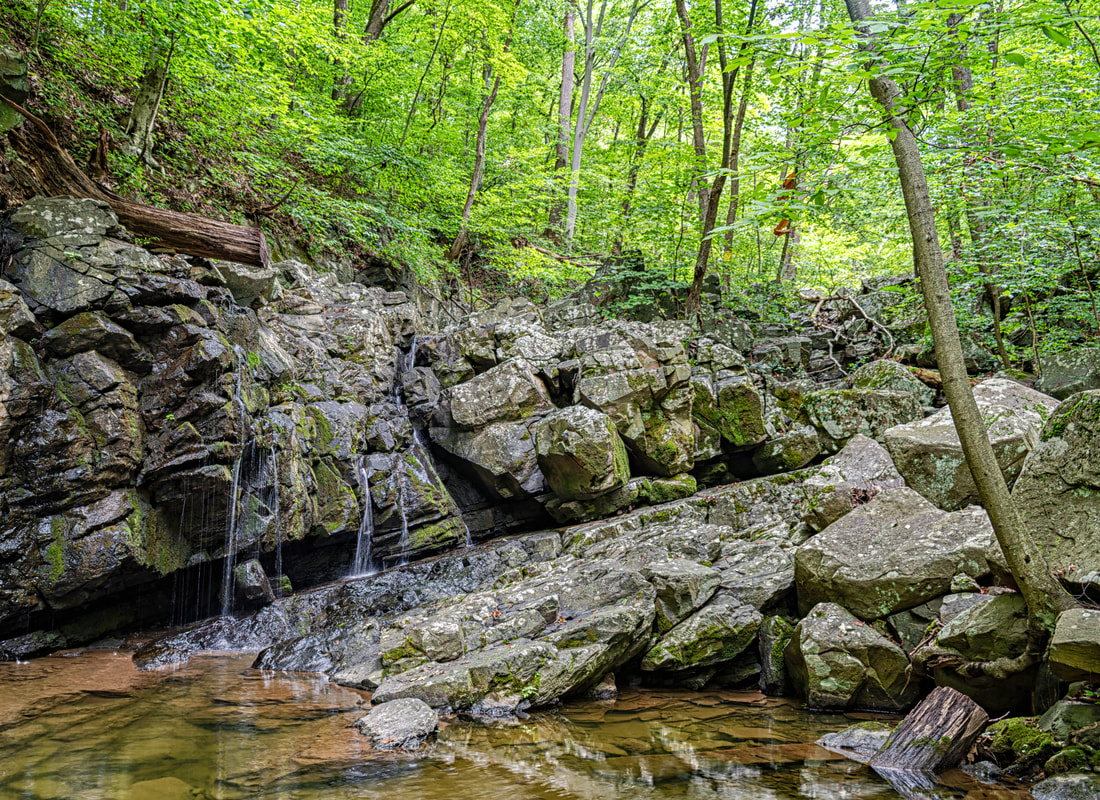
Below is the Millstone River at Rocky Hill, New Jersey. I like this spot because the cascading water and simple bridge are picturesque. On a day without wind, you can put the camera on a tripod and keep the lens open for just a few seconds. The bridge and trees will be sharp; the water will be flowing smoothly.

Picture
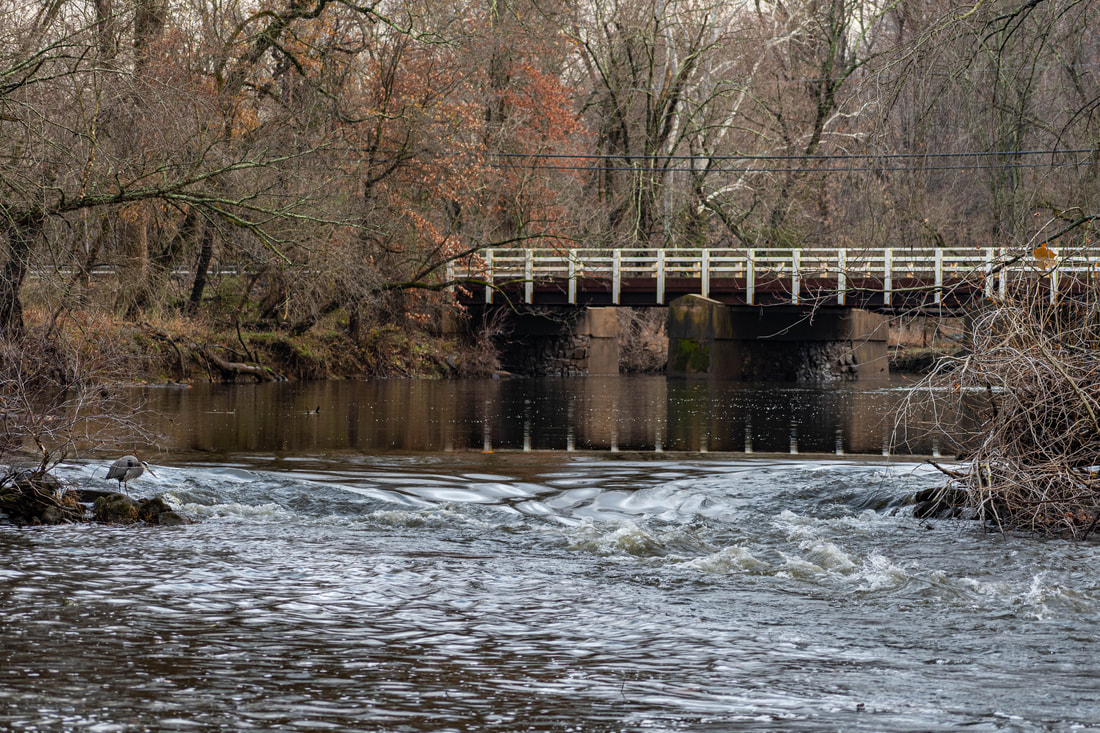
On this day, I wanted to make sure the heron was sharp, so I used faster shutter speeds. The tradeoff was that the faster speeds worked against getting the smooth flow of the water. I ultimately tried several combinations and ended up with this one. The water was moving quickly, but I still got some smoothness and kept the bird sharp. Compromise was necessary so that I could successfully capture the bird, bridge, and water.

The bottom line is that some combinations just won’t work, and you have to consider what you want your image to show. I wanted to include all of the elements that could capture the beauty of this spot, not just one or two.

2 Comments

Challenges in Landscape Photography

1/10/2022

2 Comments

 
There is a lot written about landscape photography, and many of the instructional videos, tutorials, blogs and articles identify elements that could theoretically improve your images. I have identified three of the challenges that I feel need to be dealt with in order to have an effective and powerful landscape image.

1. Actually Photographing a Landscape
Consider what it is you are photographing. Today, landscape encompasses not just conventional ideas of rolling hills and blue skies at the one extreme but also environmental damage at the other end. In between, landscape covers the images of great mountains, nature at its most dangerous, individual trees, rural village scenes, and more.
 
Decide exactly what you want to photograph and why. To make an effective landscape photograph, without being too preachy about it, you should give some thought as to what you want to capture.
Picture
I had a clear purpose in mind with the above photograph. I wanted to include elements of the landscape in my overall geographic area, and this spot has its own unique identity, beauty and grandeur. Having decided what type of landscape I wanted to capture, I composed this with the idea of documenting the impressive natural features of the land.
 
2. Appreciating the Weather
The sun is not always your friend, and overcast, foggy weather can sometimes give you atmospheric and evocative images. Don’t view bad weather as a problem; view it as another means of presenting landscape. In particular, rain or fog can present a familiar scene in new and often alien ways.

Picture
This is a familiar place to me, and I have shot it in all seasons. The view is from a small bridge crossing the brook, but the fog has made this tame brook look mysterious. The brook vanishes into the fog, and the woods are now ominous.
 
Make lemonade out of lemons. If you can’t photograph the bright blue sky and clouds reflected in the water because of bad weather, look around and experiment to see how you can make that weather work for you.
 
3. Don’t overdo the color
The general rule is to try to take the best picture you can with the camera. Working with software like Photoshop can do quite a bit, but it cannot repair certain fundamental problems. Something blurred really cannot be made sharp, for example, or at least it cannot be as sharp as it would be if the picture was a better one to start with. What post-processing can do is help with vibrancy, saturation and contrast. It can also help bridge the gap between highlights and shadows. One of the biggest problems is the overuse of these filters, and that might cause the image to look artificial. We see this overdone with high dynamic range (HDR) processing where the image does show details in the highlights and shadows, but looks more like a greeting card than a landscape photograph. If it is overdone, you just might ruin your image.

Picture
Here I wanted to capture an element of landscape and a scene that combined water and a rockface. I was there in the middle of the day when the light was okay but not the preferred light of early morning or late afternoon. Still, I felt I could make the light work for me by not focusing on the sky and by using post-processing.
 
I worked with the various filters, trying to accentuate the color. In real life, the color was bright and amazing. In the image, I may have overdone it. I tried to bring the more muted colors alive with brightness, vibrancy, and saturation. Sometimes when I look at it I think I got it just right. Most of the time I think I overdid it and made it artificial. A version of this with at least the red/orange and the blue reflection in the water desaturated would probably be more realistic and effective. I have left it as is to demonstrate the problem of overdoing the color.
 
There are a lot of books out there telling you a lot of things about how to take the perfect landscape picture. Obviously, composition remains key, and you want to look for special moments of weather, cloud cover, and so forth. But it remains critical to focus first on what is the landscape you want to photograph, taking advantage of the scene in all kinds of weather, and finally, being careful not to undo what you have created by using excess editing.
2 Comments

Finding the Clouds

9/23/2021

0 Comments

 
Suppose you find an interesting structure in a landscape, take the picture, and get a photo like the one below.
Picture
One recommended way to photograph something like this is to put your camera on a tripod, take several pictures from the exact same location, exposing in one for the sky, in another for the structure, and still another for the grass. But you don’t always have your tripod or that ability. The general rule is expose for the shadows, develop for the highlights, so you can capture the detail. So what else can you do?

You will want to use image processing software that allows adjustments to highlights and dehazing, always being careful not to overdo it. Some programs will engage in automatic high dynamic range (HDR) processing that all too often turns the image into something resembling a greeting card. You need to satisfy your eye as to what looks good. Note that you are not inventing anything; you are using these filters to bring out what is there. Other filters, such as exposure or using the luminance filter for blue, can also help.  See below.
Picture
If you pay attention to the sky and look for the clouds, by using your post processing software you will find the picture that was there but lurking beneath the surface.
0 Comments

Challenges of Night Photography

8/31/2021

5 Comments

 
​Noise, blur, and subject are three very real challenges photographers can face when trying to capture images at night. There are many ways to work around the obstacles and create interesting images both while taking the photo with your camera and during post-processing. Let me explain.
 
In order to photograph at night, you need to set the camera to much higher ISO levels, and that can generate noise. Various photo editing programs and filters can reduce that somewhat, but one way to solve the problem is to work with the noise to create a particular effect. The image below was shot at ISO 16000, a shutter speed of 400, and at aperture f/20. When processing the image, I edited the moon by separating it from the background and worked with sharpening and noise reduction/blur filters in Photoshop to get the effect I liked. I was not concerned with having an absolutely sharp image. 
Picture
Blur can be a real problem. Using a tripod may be fine for certain night shots, but it is not always practical. You need to set a very high ISO and sufficiently high shutter speed so that the exposure is adequate and that blur is minimized.
 
In this image from Lisbon, I was mostly interested in the streetcar and the hotel. This was ISO 1600 and a shutter speed at 100. The people walking show some blur, and the man with his arm outstretched has a blurred and unrecognizable face. The solution is to shoot at much higher ISOs and faster shutter speed and deal with the noise issue as with the moon shot above. Or make blur part of the overall effect.
Picture
Finally, finding a good subject for a night shot can be a challenge. You can often take your nighttime photo and improve it in post-processing and eliminate extraneous elements by cropping and focusing on the core subject matter of your image that has sufficient light.
 
In the photo below, I was most interested in the interaction between the grandfather and the granddaughter. Her face is not large and all the features are not shown in full detail, but there is enough sharpness to show her smile and line of sight. I dealt with the noise issues as discussed above, but felt this worked because what I wanted to show was sufficiently sharp, in focus, and discernible. This is also a situation where I used selective sharpening over parts of the image and did not crop too tightly. I didn’t care if some of the things were soft focus.
Picture
Night photography encompasses many subjects, and problems in one area may be solutions in another. A certain amount of noise, blur, or softness can add to the effect. The final product doesn’t have to be perfect. Know your camera and take advantage of one of the many editing programs to make your image even better.
5 Comments

Landscape Composition

8/23/2021

7 Comments

 
Picture
Composition is basically how the elements of a picture interact with each other. Is there a focal point that gets our attention? What is the subject of the image? How does the composition make that subject stand out? One of the challenges in landscape photography is presenting a clear subject—not just a snapshot of a general scene.

The image seen above is Kugler Falls which are small waterfalls in Central New Jersey. The stream empties into the Delaware River, however, the volume and beauty of the falls depend upon recent rainfall. In other words, there may be no more than a trickle if the weather has been dry. The flow was perhaps at a quarter or a third of its strength on the day I took this photograph. A few separate streams of water were enough to show the falls but not enough to project it in any dramatic way. In order to present a more interesting composition, I expanded the frame to place the stream in the lichen-covered boulder field through which it passed. My subject matter now was not the falls itself but this more dramatic spot along the stream.

Note the logs protruding from the upper left and the lower right of the image. The eye is drawn from one to the other in a diagonal, something that expresses dynamism and motion. Other diagonals are in the leaning tree on the right and the ridge of the boulder that moves from the lower left towards the middle right edge.

I wanted to emphasize the setting and decided to include the trees which occupy the top third of the image. A close-cropped image of the waterfall and the boulders might have been interesting for texture, but the image has more of a sense of place because of the inclusion of the trees. The green of the trees also picks up the green of the lichen and helps integrate the image.

You get a general idea of the rugged, isolated nature of this spot even though it is less than half mile from a road.

So think about composition when the original and desired subject matter of your image (in this case, the waterfall) is not enough to sustain the image. Look around. Think in terms of a broader context. Maybe instead of the waterfall the subject matter can be dramatic boulders, the mature forest, and the fallen logs. 
7 Comments

Keeping It Natural

3/26/2021

5 Comments

 
Picture
What do you do when you find an attractive spot that is marred by fencing and other man-made structures that are simply not appealing in a landscape photo? One solution is to crop and frame the photo, focusing on what is essential. Even if it means sacrificing some of the subject, the entire image may be improved.

This is Buttermilk Falls in Washington Valley Park in Bridgewater, New Jersey. It is the result of a dam of Middle Brook. It is in the valley along the First Watchung Ridge and has a certain picturesque appeal.

If I had shown the entire face of the waterfall with virtually all of the fence and concrete dam portions eliminated, the rest of the brook would not be seen from that angle. By focusing on a significant portion of the fall to give a sense of its height and force, I placed it in context and showed other natural features of the area—particularly the trees and the ravine through which the brook flows.
 
The photo shown below is the original image. What do you think?

Picture
5 Comments

Capturing Snow

3/5/2021

2 Comments

 
There are ways to create the effect of snow in your images using software, but nothing beats the real thing. The problem is capturing the falling snow so that it is visible.

First, you want to get the right background. Leafless trees standing in a thick woods will do; shooting against a whitish overcast sky will not be as effective. Dark buildings or bridges as structures provide interest and enough contrast to catch the snow.

Another issue is shutter speed. The faster the shutter, the more it will freeze action. It depends on the kind of look you want. At 1/60th of a second, you get mostly distinct flakes as tiny round objects, although some may be bigger and slightly blurred as they are in motion. I have tried even faster shutter speeds, but if the flakes are too small and you freeze them in motion with no movement, you may not see them. At 1/13th of a second, you can still manage a hand-held shot comfortably and keep the image sharp, but wind-blown snowflakes will streak and blur a bit, making them longer, if not larger. In the two images below, the first was shot at 1/60th and the second at 1/13th. Judge for yourself which you find more effective or pleasing.

Picture
Picture
2 Comments

Legitimate Image Manipulation

1/15/2021

3 Comments

 
Photographs can be manipulated in many ways. With excessive manipulation, however, the image might not be believable. I generally want to accurately capture the scene before me, but sometimes brightness and other factors can obscure significant details. Yet there are ways to enhance those details without overly manipulating the original image.

Below is a photograph of the snow-covered Princeton Battlefield at sunrise. It is exactly as I photographed it.

I never look directly at the sun, but I detected it out of the corner of my eye. I liked the way the light brightened the snow in a graduated way. The sky was interesting as the rays shot out. I focused the camera without looking at the sun, closed my eyes, moved the camera to the left, and pressed the shutter. 

Picture

Now consider the next image.

Picture
Through the use of the filters in Lightroom and certain specialized plug-in filters in Photoshop, I created a very different photograph. It is dramatic and more accurately reflects the reality of the scene rather than what my eyes could see. I did not bring out anything that wasn’t already there. I actually consider this the more realistic image of the two since it captures colors and contrasts that my eyes could not detect. It has not been overdone with saturation, but the increased contrast has made it more interesting overall. I removed the bluish cast of the snow, increased the contrast in the sky, and brought out some detail in the trees. 

In other words, manipulation may add legitimacy to the image when it comes to being able to present accurately what might sometimes be invisible to the naked eye.

3 Comments

Making Connections

11/30/2020

2 Comments

 
We love to give names to inanimate objects. One might look at a natural rock formation and see an old man in the mountain, for example. Often these names are reflected on a map; many have persisted for decades. If you think in terms of making your own associations, an otherwise ordinary photograph could potentially tell a story.
           
Take this example.

Picture
I was hiking in the Sourland Mountain Preserve, a place filled with boulders and rock formations. I found these two formations and my initial thought was they resembled a married couple. I then thought that they could be a parent and child or just two friends. Regardless, I saw a relationship that had human qualities.The key is to frame it correctly so that the viewer might see a connection.
           
I made several images from different angles and opted for one that allowed the two entities to be shown with virtually no overlap. I avoided branches and brush interfering with a full depiction of the formations. The apparent leaning of the formations is how they were, as you can see the incline of the mountain behind them.
 
Be creative. What might not be especially interesting initially can result in an intriguing and unusual image.
2 Comments

Capturing Autumn

11/11/2020

5 Comments

 
We have all experienced the “wow” effect of driving along a road and suddenly a blaze of foliage captivates us. Unfortunately, when we stop and go back, we can’t always seem to find that same vision. Either we are too close to the trees, or the leaves don’t seem as bright as they did, or something else keeps us from capturing the image as we originally saw it. Consider the philosophy that less is more, and sometimes one can capture the fall foliage by focusing on the details.

Here is an image from Fiddlers Creek, a natural preserve in Central New Jersey adjacent to Baldpate Mountain. 
Picture
The trees to the right are still mainly green with some yellow, and many of the leaves have already fallen. Still there were sufficient leaves remaining to make the image appealing, and I could see the reflection in the water of the orange leaves. It’s like putting a mirror in the room to give the impression of a room twice the size. Even if it’s not completely filled with color, you can still get a good foliage shot by focusing on where the color is.

Also, make ample use of the filters in your software program. I found that by adjusting the hue of yellow I could obtain more orange than yellow. I adjusted other colors, such as the blue, and made use of filters to increase the luminance and light. Even if you don’t have editing software, you can still capture color by selective framing.

5 Comments
<<Previous

    Author

    Steven Richman is an attorney practicing in New Jersey. He has lectured before photography clubs on various topics, including the legal rights of photographers. His photography has been exhibited in museums, is in private collections, and is also represented in the permanent collection of the New Jersey State Museum. ​

    Archives

    January 2022
    September 2021
    August 2021
    March 2021
    January 2021
    November 2020
    August 2020
    May 2020
    January 2020
    August 2019
    June 2019
    May 2019
    April 2019
    February 2019
    January 2019
    December 2018
    August 2018
    July 2018
    April 2018
    March 2018
    February 2018
    January 2018
    June 2017
    May 2017
    April 2017
    March 2017
    February 2017
    January 2017
    December 2016
    November 2016

Proudly powered by Weebly